Motion Collab is a collaboration project between other motion designers.
Brief
Create a 30-second title sequence based on the legendary tale of King Arthur! Picture a magical medieval England as the backdrop, we’ll showcase key characters and pivotal moments from the story.
The task is to weave character names into the sequence and select a fitting music track. You can choose your own style, whether it’s 2D, 3D, or anything in between. I chose 3D because I wanted to build on my skill set and force myself outside my comfort zone.
Process
The project is divided into the natural motion design process: Moodboard, Storyboard, Design and Animation, with separate deadlines.
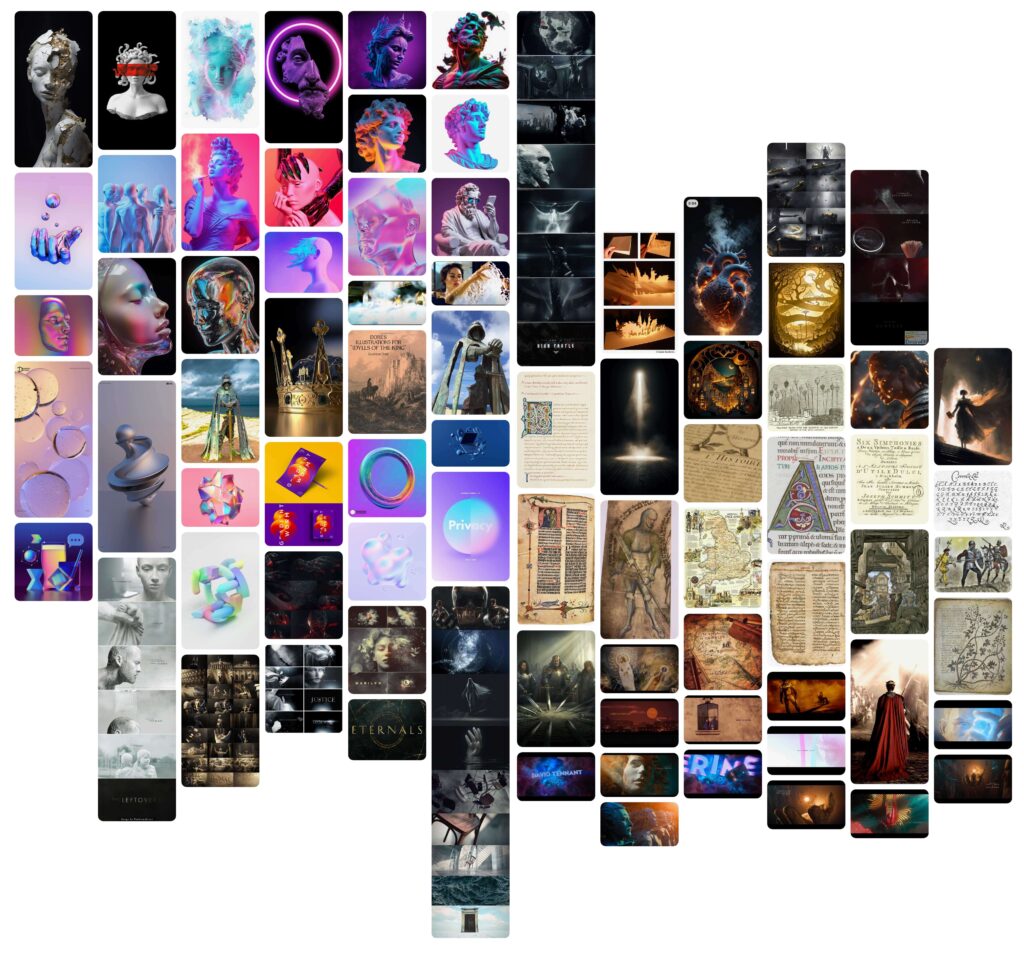
Moodboard
I wanted to use a 3D style with a mystical sci-fi look getting inspiration from the Foundation series title sequence.
Storyboard
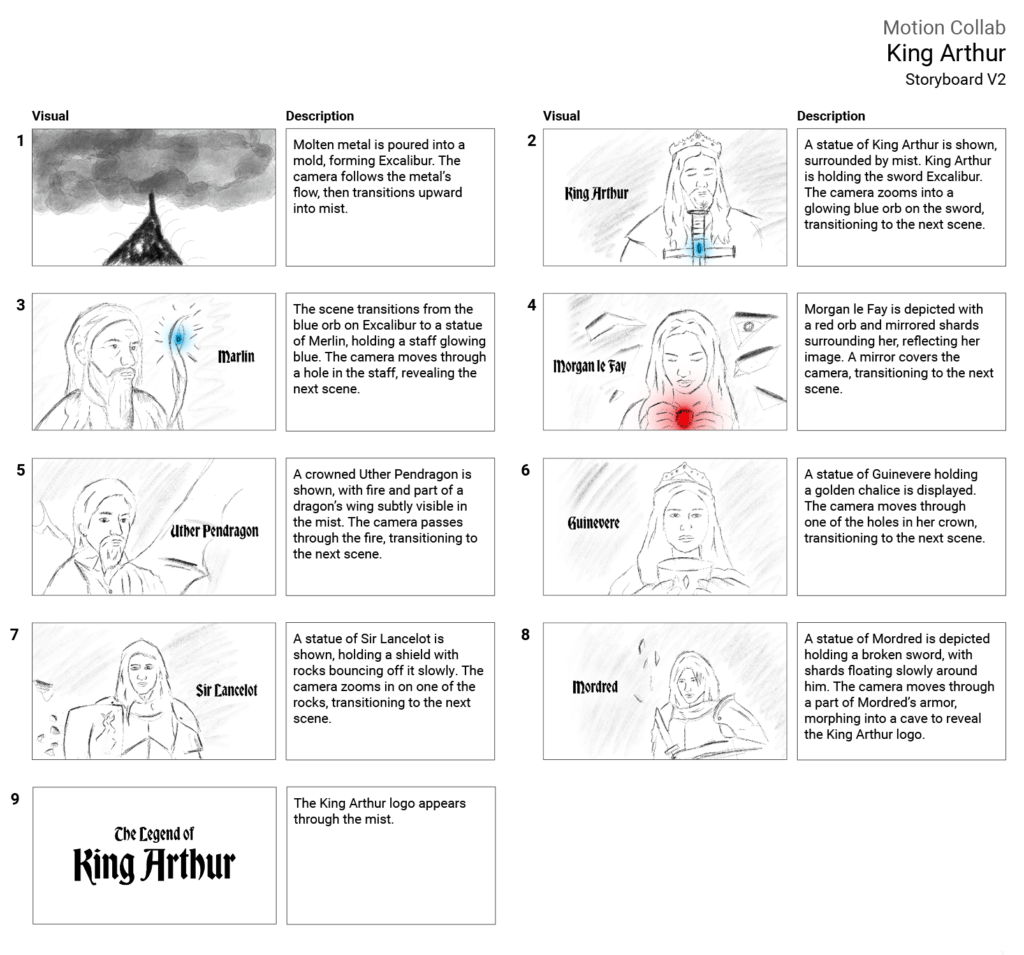
Animatic
I created an animatic with music that I had chosen to figure out the timings and whether some of the frames would allow for certain transitions before starting to design the 3D models. Although I included the first frame, it didn’t make the cut; the timing was way too tight.
Music: Sci-Fi Cinematic Intro – ArctSound (From PixelBay)
Design & Animating
I divided each character into stages in building the models.
Step 1: Created AI images of faces on stable diffusion to use as references for building the faces on Blender
Step 2: Create the faces on Blender using the reference images.
Step 3: Create clothing and Items.
Step 4: I combined elements and sorted out the composition before animating them. I decided to buy some items, like clothing and armour, after considering the timing and render times, as I knew they would take a lot of time. For example, I got Sir Lancelot and Mordred armour, Sir Lancelot’s shield, Morgan Le Fay’s clothing, and Merlin’s staff. The rest I created using clothing and stitching simulations, and for Crowns, I used Geometry nodes. The rest are standard modelling techniques.
Step 5: When creating the scene, I made volumetric material and also got volumetric clouds from BlenderKit. However, I found that volumetric clouds kept clipping, so I used VDB clouds instead. While placing clouds and tweaking volumetrics, I set up lighting and tested renders to eventually render out the final renders along with Matt layers for compositing on After Effects.
Step 6: I brought in finished renders and tweaked the timings. I also used some solid Matts for masking and tweaked contrast and brightness.
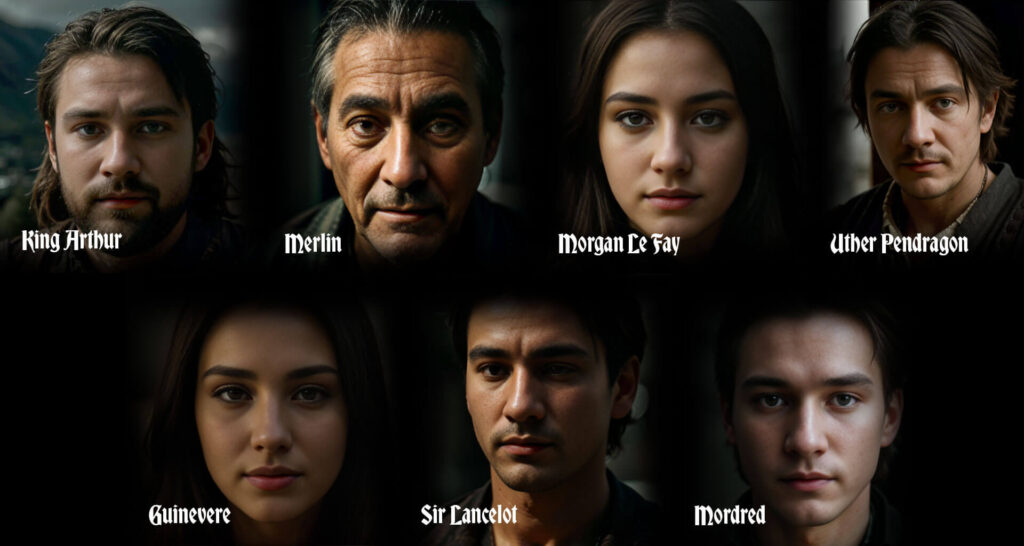
Generated Ai Images of faces with Stable Diffusion to use as references when creating the faces.
Learnings
Throughout the process, I always thought of the pipeline so it was as streamlined as possible to improve workflow for 3D projects and also a skill set that will come in handy. The number one problem I found is that the render times using cycles were a huge bloating in the pipeline. I could have made the modules on Blender and done the scene setup and rendering all through Unreal, which I have yet to learn. However, through research and advice from 3D generalists, it would have been a less frustrating workflow.


